Linting in Swift
Linting in Swift
While I am new to Swift, I have been writing code for a long time (mostly Python) and having a clean codebase is very important to me. One of the main ways that developers keep their code clean is with a linter. A linter is a tool that analyzes source code to flag programming errors, bugs, and stylistic errors.
While there appears to be a number of different linters available for Swift, the most popular appears to be SwiftLint. While popular doesn’t always mean the best (I’m not making any judgement here), it does mean that it will most likely have the most examples and community support which can be crucial to a developer learning a new technology.
Installation and Configuration
While there are a number of ways to install SwiftLint (you can find them all here), my preference is for Homebrew since I can automate the installation of all my apps with Ansible. To install it from the command line, you just run the brew install command.
1
brew install swiftlint
Running from the Command Line
Once the application is installed it is straightforward to run. You can run it on all the files in directory using the command without any arguments (lint is the default argument).
1
swiftlint
You can run it against a specific file by calling the filename with the command.
1
swiftlint ContentView.swift
SwiftLint can also automatically correct some of the errors by running the command with the --fix switch.
1
swiftlint --fix
You can view the list of all the rules and whether or not they are correctable by running the rules command. The rules command will also show you whether or not the rule is one that you need to opt-in to and whether it is enabled in your configuration.
1
swiftlint rules
You can also run the rules command on a specific rules to see the YAML configuration and examples.
1
swiftlint rules type_name
Configuring XCode to Run During the Build Process
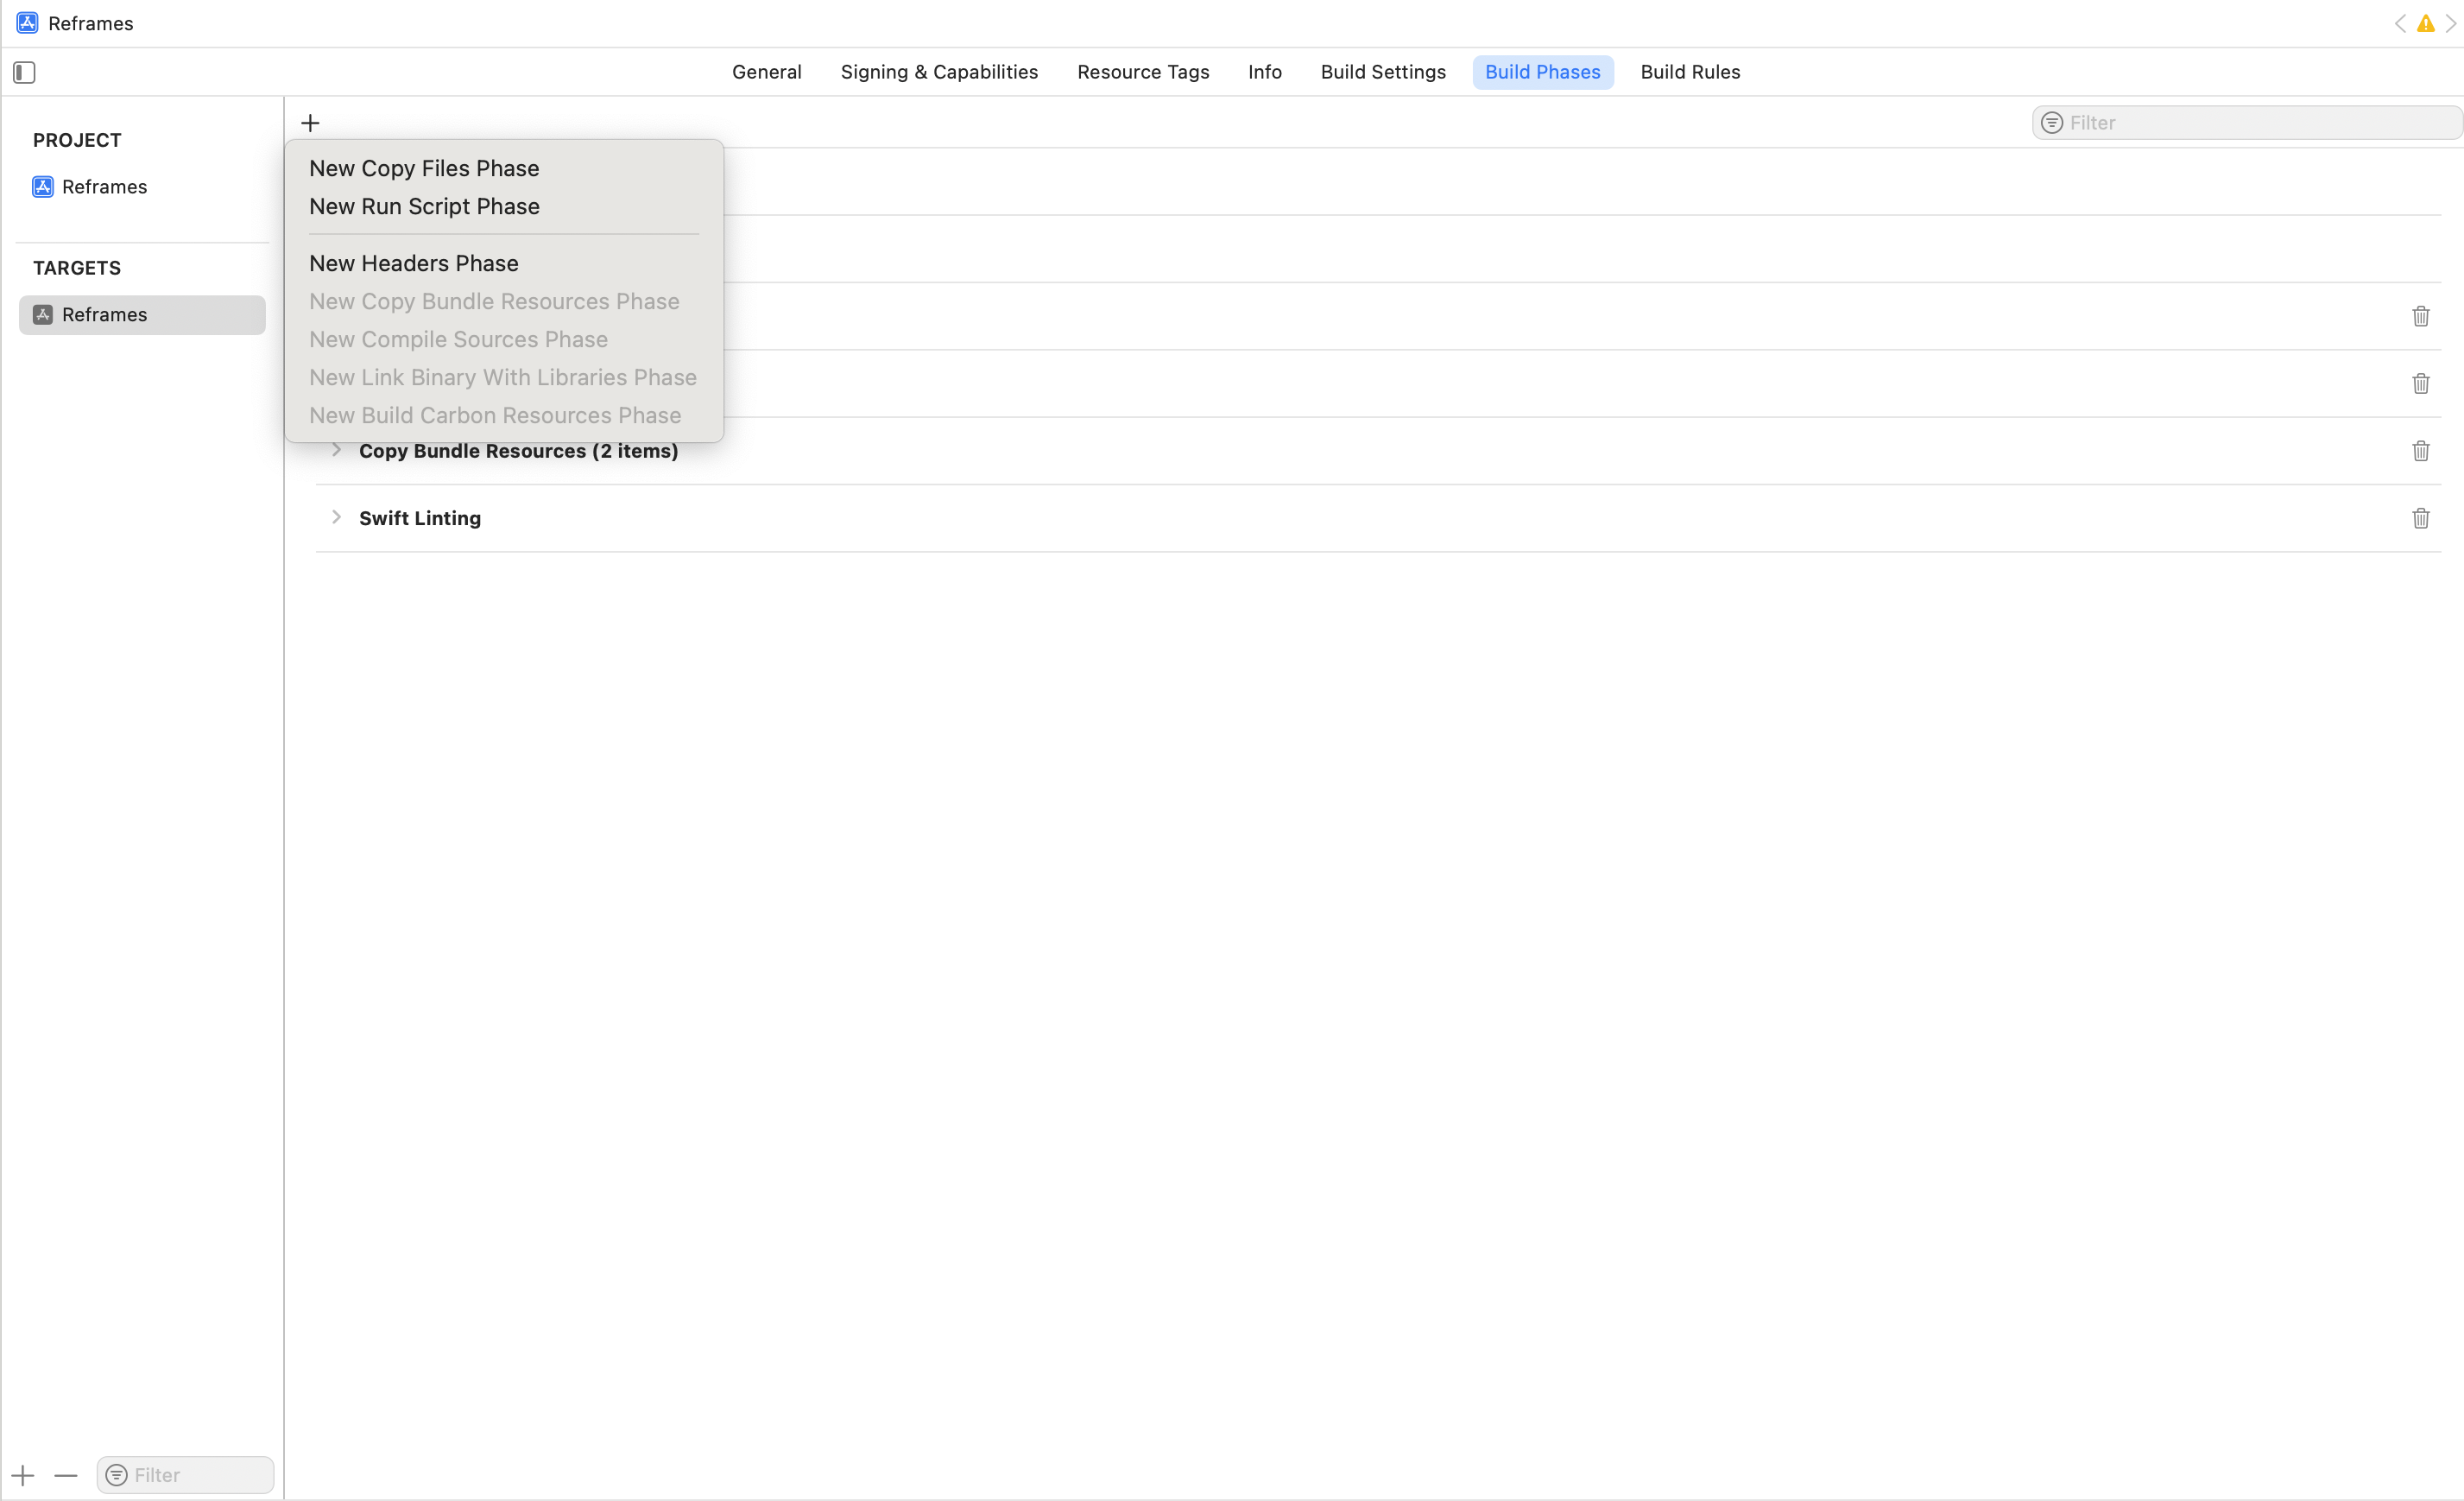
You can also configure SwiftLint to run during the build process in Xcode by creating a custom build phase. To do that, select the project from the Project navigator and then select the Build Phases tab.
Choose your application under targets and then click the plus button and select New Run Script Phase.

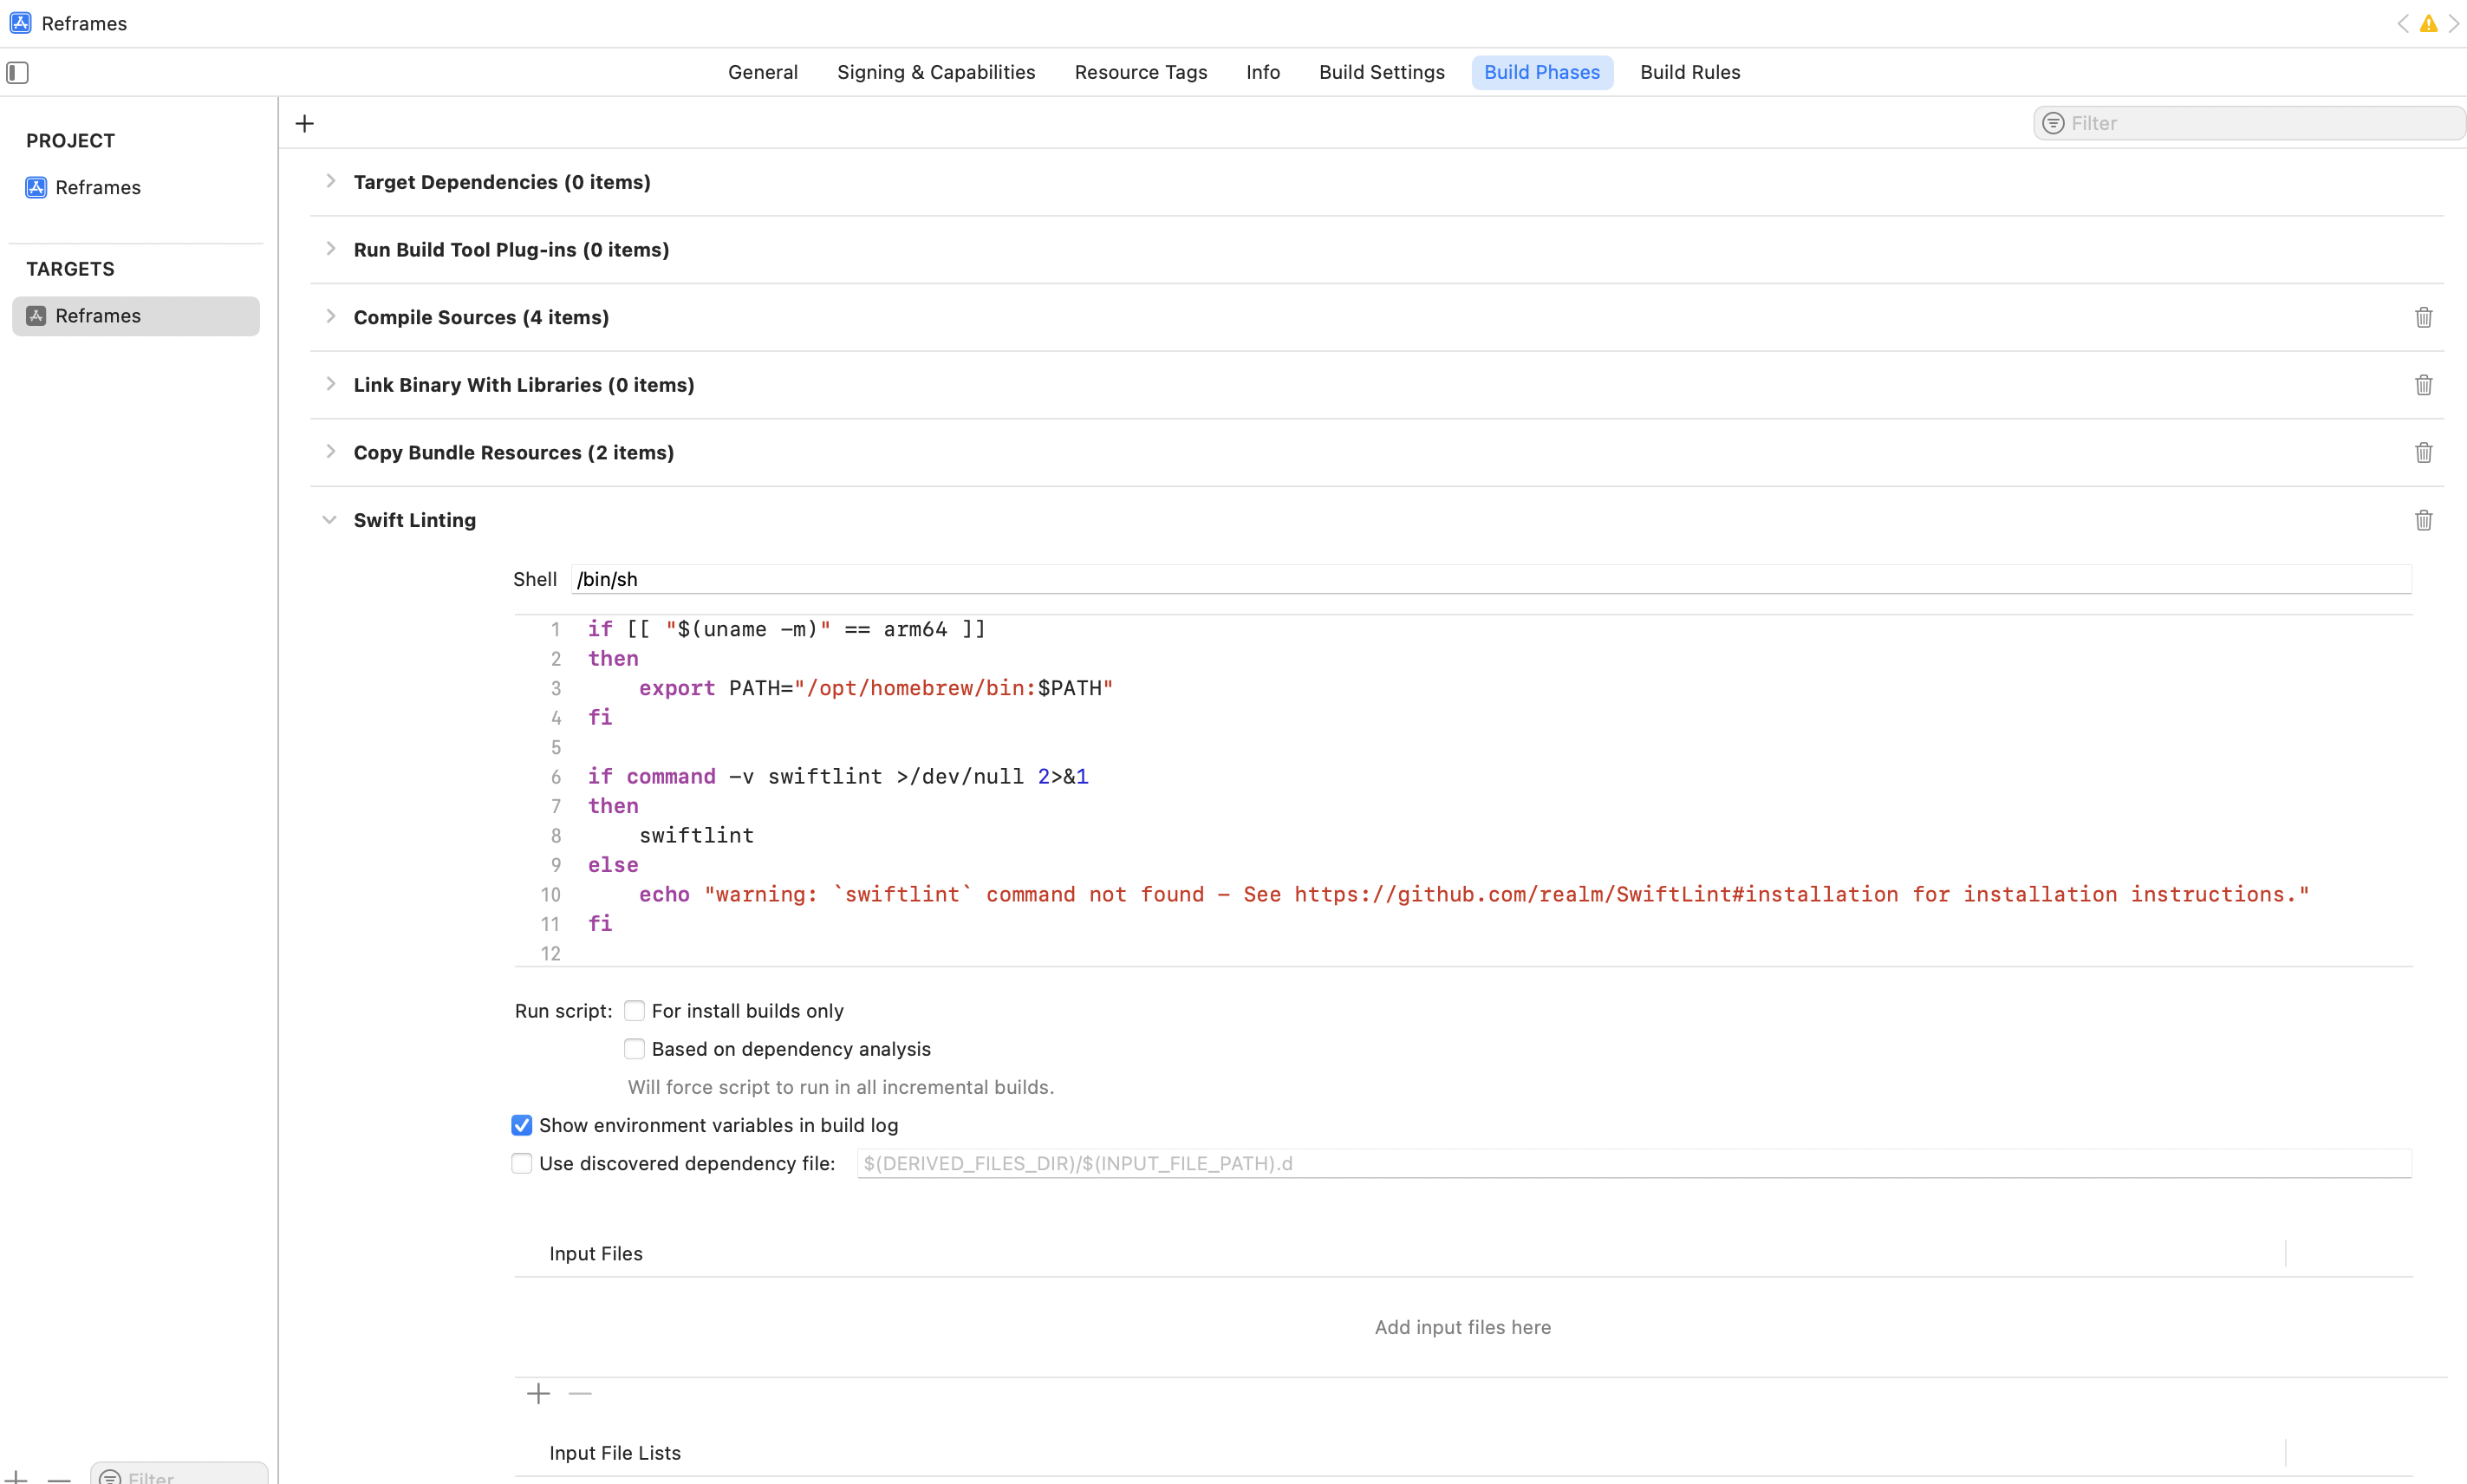
Rename the new phase to something like “SwiftLint” or “Swift Linting” and paste the below script.
1
2
3
4
5
6
7
8
9
10
11
if [[ "$(uname -m)" == arm64 ]]
then
    export PATH="/opt/homebrew/bin:$PATH"
fi

if command -v swiftlint >/dev/null 2>&1
then
    swiftlint
else
    echo "warning: `swiftlint` command not found - See https://github.com/realm/SwiftLint#installation for installation instructions."
fi
and uncheck the “Based on dependency analysis” button. 
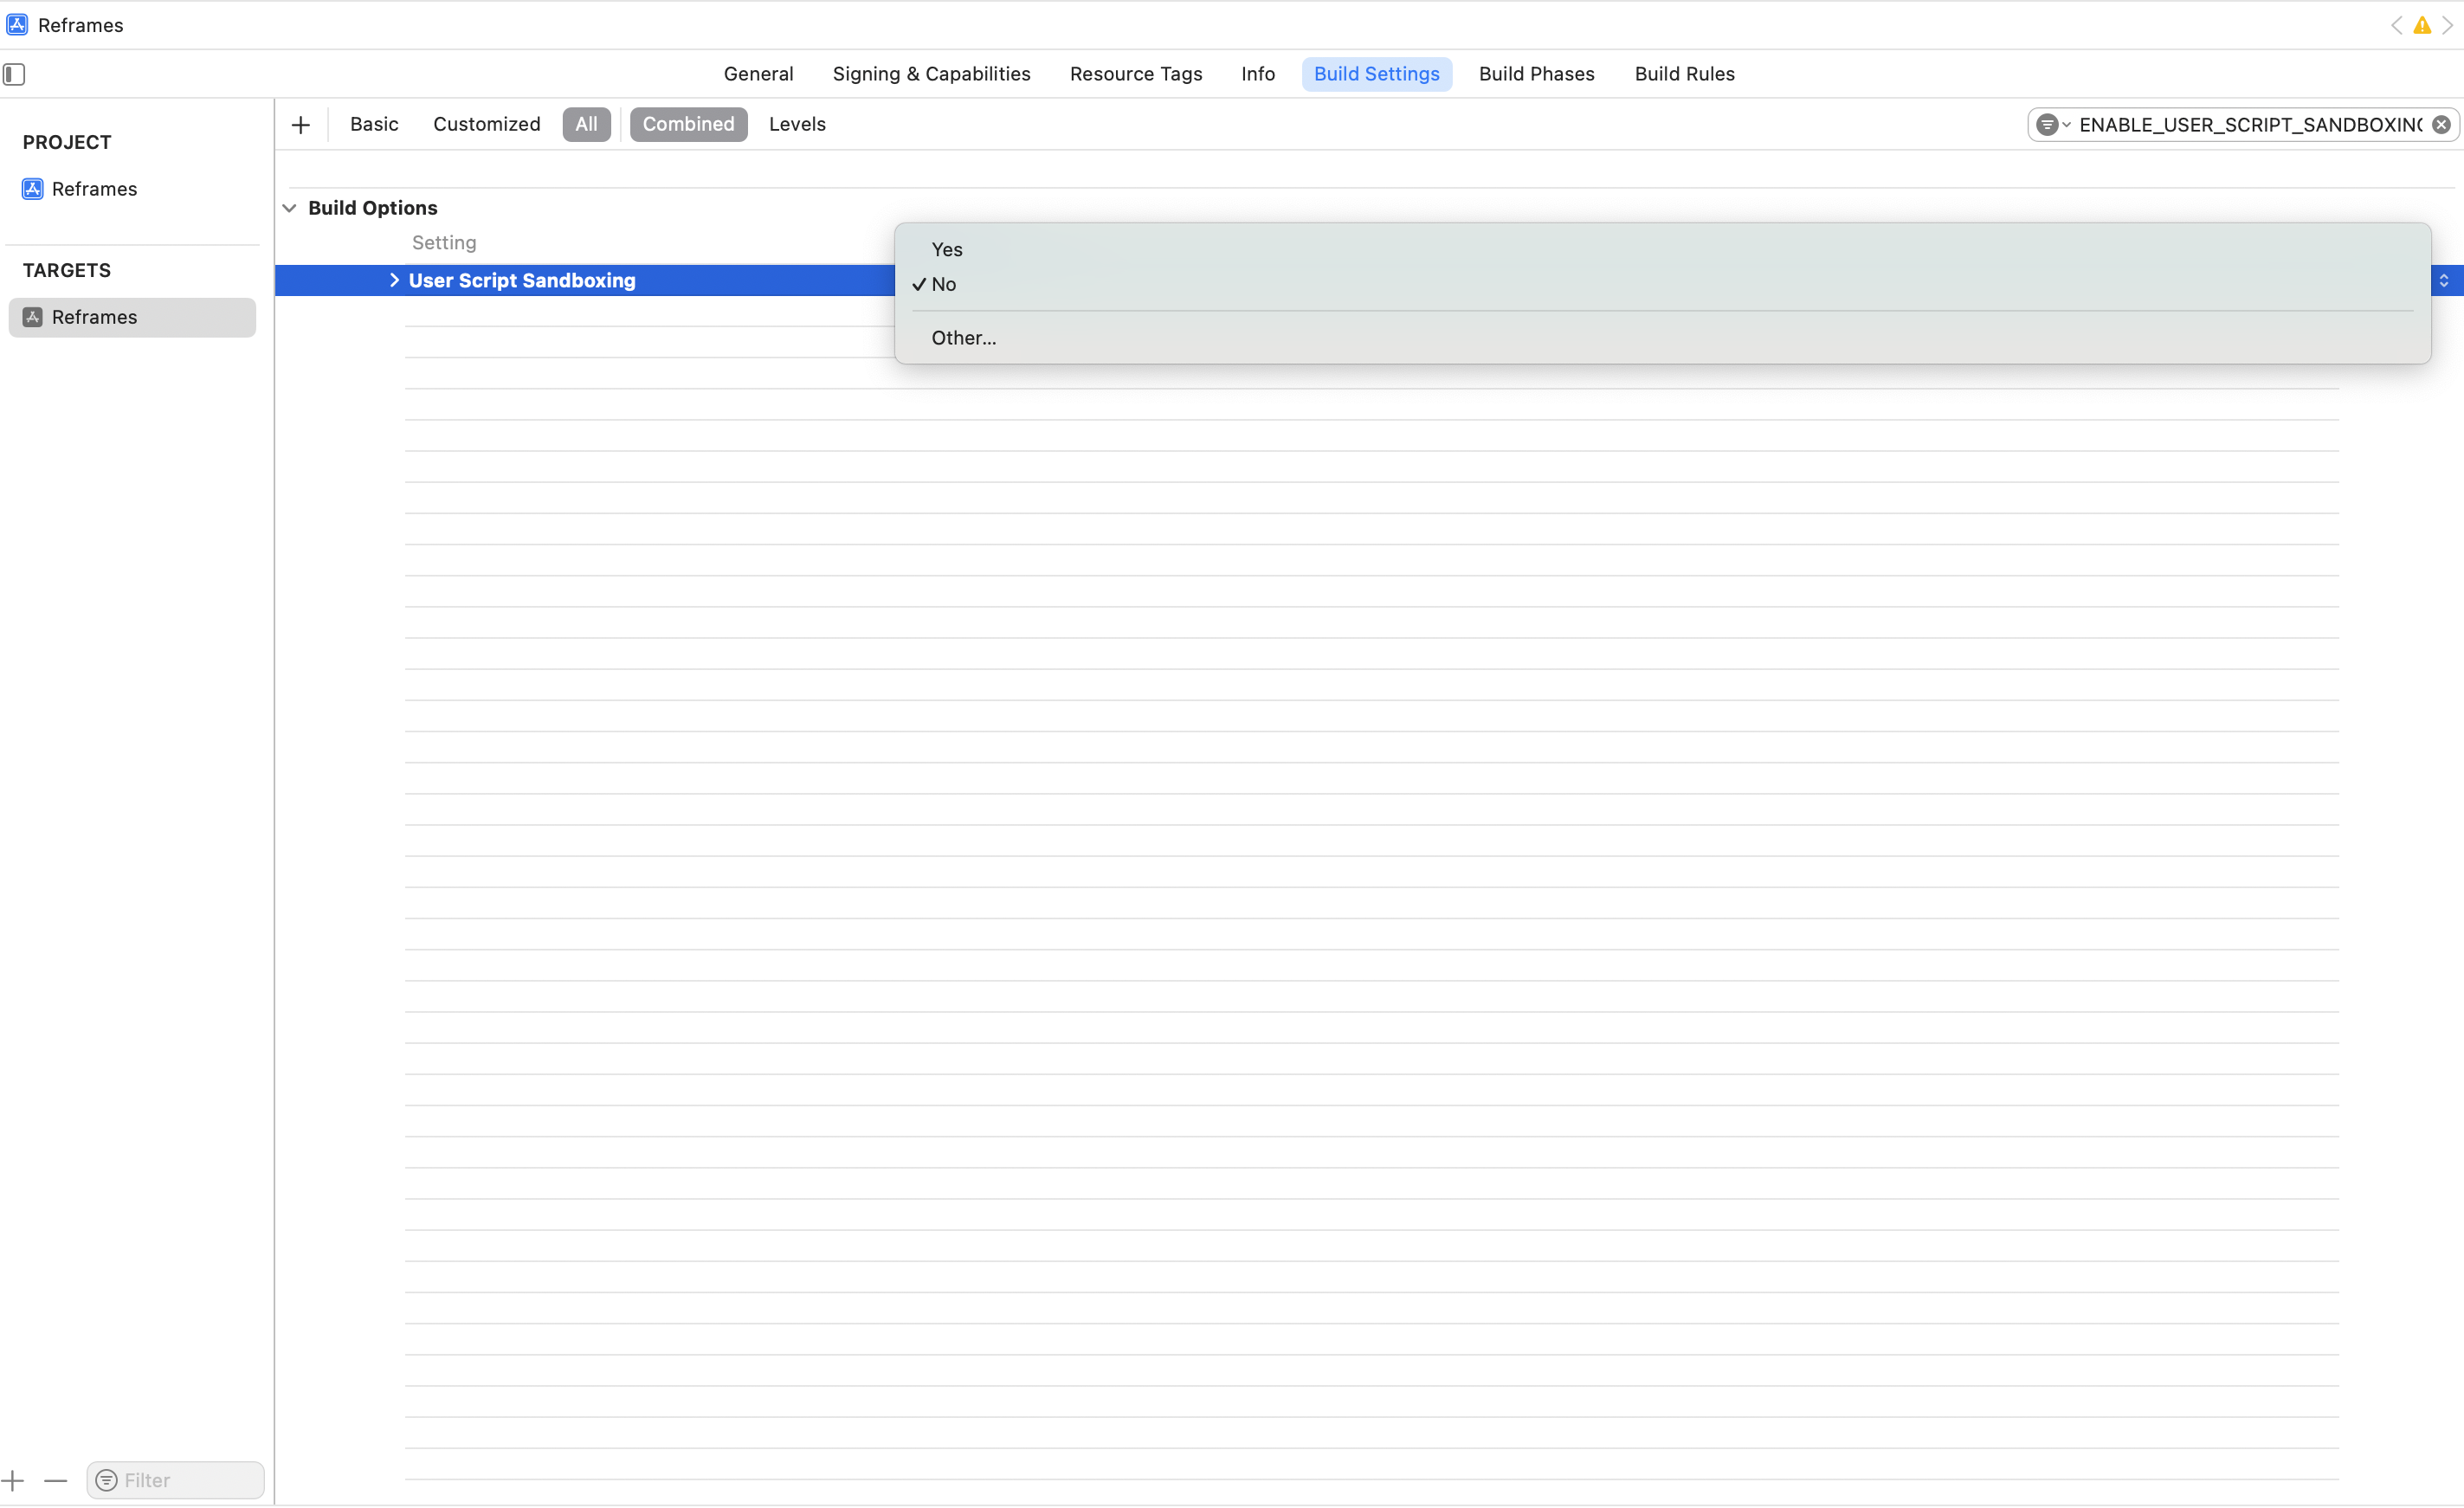
Finally, if you are using Xcode 15 or later you need to turn off User Script Sandboxing. To do that, go to “Build Settings” and search for ENABLE_USER_SCRIPT_SANDBOXING and change “User Script Sandboxing” to “No”. 
Now every time your build your project, SwiftLint will run against your project and you will get the warnings and errors inside of Xcode.
Using SwiftLint
Configuration File
You can configure SwiftLint by adding a .swiftlint.yml file in the main directory of your project. SwiftLint has a ton of configuration options. In addition to enabling or disabling rules, you can adjust the rule defaults (for example, change the line-length Error from 200 to 150) or create custom rules for your project. I haven’t really found a reason to create a custom lint file yet, but I know I will eventually want to turn some of the disabled ones on.
Exclude a Specific Violation
Sometimes you may want to skip a enforcing a rule on a specific violation. For example, if you are writing your own ` ==` function for a custom Equatable, you might write the following code.
1
2
3
 static func ==(lhs: Filter, rhs: Filter) -> Bool {
        lhs.id == rhs.id
    }
This will cause a violation of the operator_whitespace rule because swiftlint wants to have a space on either side of the ` ==`.
1
Operators should be surrounded by a single whitespace when defining them (operator_whitespace)
Normally, we would want to enforce this rule so that if we accidentally wrote if this ==that we would want it corrected to if this == that. But in this case we want to ignore the rule for this specific violation. To do that, we can add a comment to the code right before the line that will cause the violation.
1
2
3
4
// swiftlint:disable:next operator_whitespace
 static func ==(lhs: Filter, rhs: Filter) -> Bool {
        lhs.id == rhs.id
    }
Exclude an Entire File
You can also exclude an entire file from being linted for a specific rule. To do that, you turn off the the rule at the beginning of the file
1
// swiftlint:disable linelength
And then turn it back on at the end of the file.
1
// swiftlint:enable linelength
Pre-Commit
I can be a little scatter brained, so remembering to run a linter before I check my code into my git repository can be hit or miss. Having SwiftLint configured as a build phase in Xcode helps, but even then I’m likely to miss warnings on files I don’t have open if I’m not paying attention.
Thankfully, SwiftLint can also be run as a pre-commit hook. You do that you just need to create a file called .pre-commit-config.yaml in the root of your repository and then add the following code. Update the revision (rev) to the most recent version of SwiftLint
1
2
3
4
5
6
7
-   repo: https://github.com/realm/SwiftLint
    rev: 0.50.3
    hooks:
    -   id: swiftlint
	    # Add the entry line if you want it to automatically fix the files and
	    # fail if there are any warnings.
        entry: swiftlint --fix --strict
With these changes I can be confident that the code I write will be clean and consistent across my codebase.